


In the realm of preserving cherished memories, photo restoration plays a quintessential role. Old photographs, often faded, torn, or simply worn by the passage of time, can be brought back to life, weaving tales of yesteryears with a vibrancy that defies age. The process of restoring old photos is akin to embarking on a journey through time, delicately traversing the contours of the past. As we further explore this fascinating aspect, get ready to step into a world where nostalgia meets technology, reviving the silent whispers of history trapped within old photos.
Table of Contents
The Process of Restoring Old Photos
Restoring old photos is a meticulous process that requires a blend of technical skill and artistic intuition. It begins with scanning the photograph at a high resolution to create a digital copy. This copy then undergoes the restoration process involving a variety of software tools designed to mend tears, smooth creases, eliminate spots, and correct faded colors. The aim is to restore the photo to its original glory without diminishing its inherent vintage charm. The end result is an old photo restored, ready to continue its journey through time with renewed vitality and preserved inherent charm.
Tools and Techniques Used to Restore Old Photos
1. Photoshop:
Adobe Photoshop is arguably the most powerful tool in the photo restoration toolbox. It offers a vast array of features that are perfect for restoring old photos, such as the ‘Healing Brush Tool’ for eliminating scratches and the ‘Clone Stamp Tool’ for replacing missing or damaged areas. Its ‘Curves’ and ‘Levels’ tools allow for precise color and contrast adjustment, providing the ability to breathe new life into faded or discolored photographs.
2. Lightroom:
Adobe Lightroom is another invaluable tool for old photo restoration. While it doesn’t offer the same level of detailed editing as Photoshop, its strength lies in its streamlined interface and powerful batch editing capabilities. It’s especially useful for color correction, noise reduction, and overall brightness and contrast adjustments, making it an ideal tool for the initial stages of the restoration process.
3. Scanner Settings:
High-quality scanning is a crucial first step in any photo restoration process. Using a flatbed scanner with high-resolution settings (usually 600 to 1200 dpi) ensures that the digital copy of the photo captures as much detail as possible. It’s also important to use the color mode, even for black and white photos, to capture the maximum amount of information.
4. Dust & Scratches Filter:
Many photo editing programs, including Photoshop, have a ‘Dust & Scratches’ filter that automatically removes small imperfections. It works by blurring the image slightly, which can help to hide minor blemishes without noticeably reducing the image’s overall sharpness. This can be a timesaver for photos with a lot of small scratches or dust marks, but it should be used judiciously as overuse can result in a loss of detail.
Step-by-Step Guide on Photo Restoration
Step 1: Scanning the Photograph
The first stage in the journey of photo restoration is creating a high-quality digital version of the old photo. Set your flatbed scanner to a high resolution, typically between 600 to 1200 dpi, and select the color mode, even for black and white images. This ensures that you capture the maximum amount of detail and color information from the original photo. Once scanned, save the photo in a lossless format such as TIFF to avoid any quality reduction.
Step 2: Initial Clean-up
Open the scanned image in your chosen photo editing software. Begin by using the ‘Dust & Scratches’ filter to remove any minor imperfections. You can also use tools like the ‘Clone Stamp’ or ‘Spot Healing Brush’ for larger spots or tears. Remember to make these changes on a new layer to maintain the integrity of the original image.
Step 3: Color Restoration and Correction
Once the physical damages are repaired, turn your attention to restoring the photograph’s colors. This step is crucial to restore old photos to their former glory. If the image is discolored due to age, tools like ‘Curves,’ ‘Levels,’ and ‘Color Balance’ can help correct these issues. Always adjust these settings gradually to maintain a natural look and feel.
Step 4: Final Touches and Quality Check
After the color correction, carry out fine adjustments to the contrast, sharpness, and brightness levels if required. An important aspect of this step is to maintain the inherent vintage charm while enhancing visibility and vibrancy. Finally, zoom in and inspect the photo thoroughly for any missed damages or color inconsistencies. Once satisfied, save your work and export the restored photo in a high-quality format. With these steps, we have an old photo restored, ready to be embraced by the present while cherishing the past.
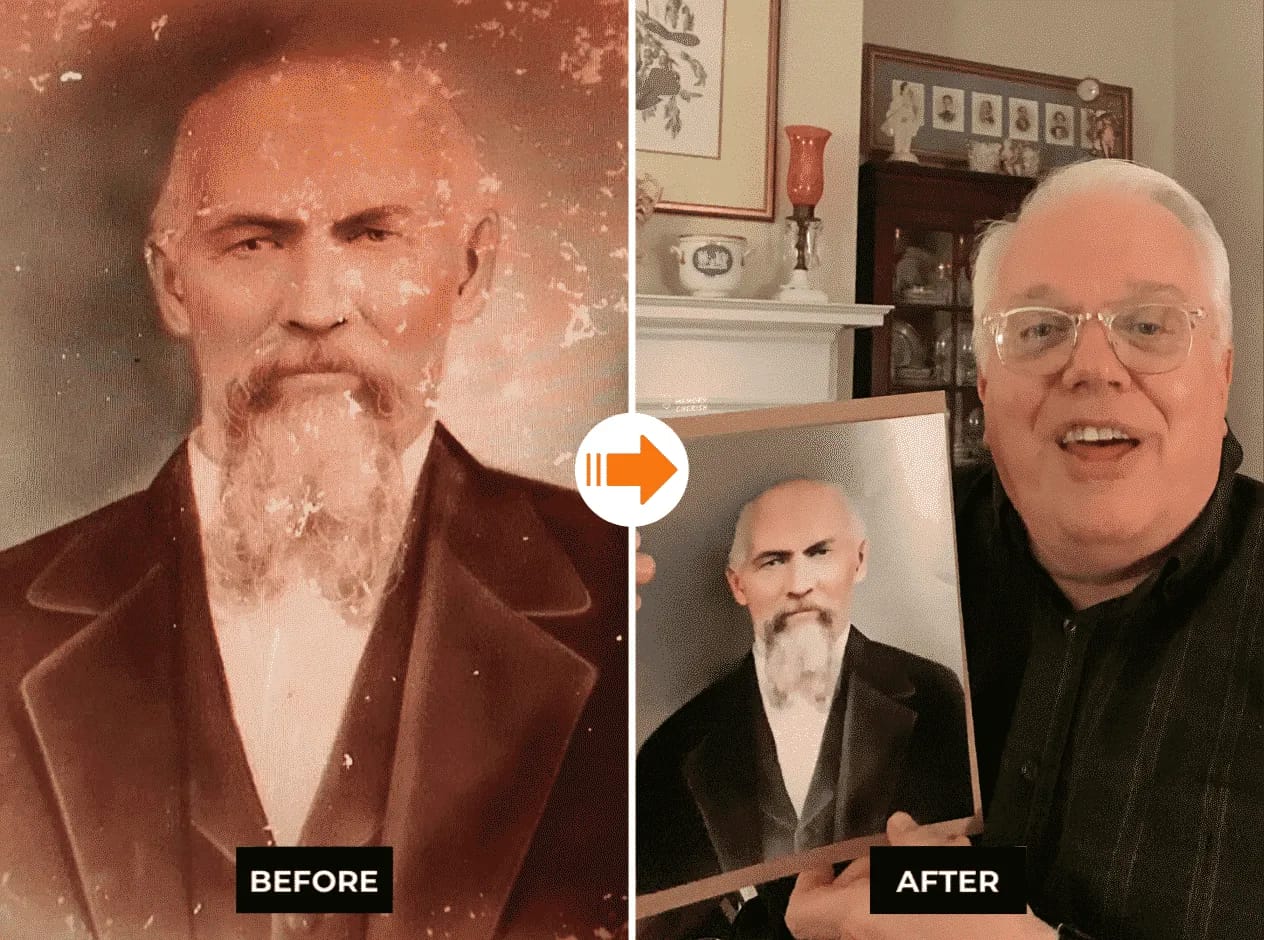
Restore Old Photo With Memory Cherish
Amid the technological marvels of the digital age, MemoryCheirsh emerges as a beacon for those seeking to restore old photos. A platform that masterfully blends technical precision and artistic flair, MemoryCheirsh breathes new life into faded and damaged photographs, revitalizing them with a touch that respects their historic authenticity while enhancing their visual appeal. Armed with an array of advanced tools and techniques, MemoryCheirsh invites you on a journey to revisit your cherished moments, serving as a time machine that brings your past into the vivid present. Whether it’s a portrait etched with the wrinkles of time or a landscape tarnished by years, each old photo restored by MemoryCheirsh is a testament to the everlasting bond of memory and the magic of preservation.
Conclusion:
In conclusion, the process of restoring old photos is more than just a technical task—it is a labor of love, an homage to the past, and a journey of rediscovery. Each photograph holds a piece of history, a frozen moment in time. To restore them is to breathe life again into these moments, to rekindle the fading embers of memories, and to cast them in a new light for future generations to appreciate. Using advanced tools and techniques, we can mend the ravages of time, restore the vibrant colors and nuances, and bring the past back to life. This is the joy and the magic of restoring old photos, where we not only preserve the past but also rediscover and reconnect with it. Through this, we’re reminded that while photos may age, the precious moments they capture remain timeless.