


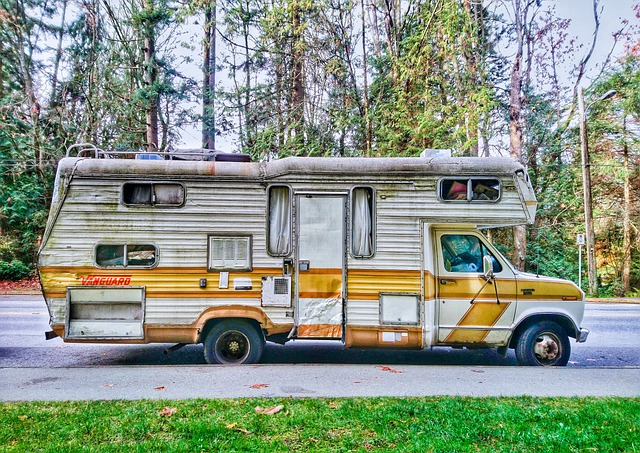
Owning an RV is not all fun and games. Granted, it’s fantastic to have a mobile home you can take to extraordinary places and sleep away from the hustle and bustle of the big city, but that comes at a price. We are not talking about the rise in fuel prices, although they are not to be taken lightly. RVs need much care, and you can’t just get in and get going. None of the chores surrounding your mobile home is as crucial as the winter prep.
Table of Contents
Why should you wineries your RV each year?
If you haven’t noticed, RVs are not the cheapest possession you can ever purchase. Moreover, it’s not something that’s light on your wallet even after you own it, as maintenance and supply are also not as inexpensive as some ads might claim. However, what can really hit you where it hurts is the repair cost. Having to fix the engine or some other special components may literally cost in the quadruple digits. So, instead of wasting money on repairs, a better idea is to properly store your vehicle/home whenever you’re not using it for a prolonged period. As it happens, winter is not among the preferred seasons for camping. Moreover, extreme colds can do much more damage than a layer of dust on the front shield. So, naturally, winterising and adequately storing your RV can significantly reduce your budget on preparations for the summer and, more importantly, on repairs.
To help you winterise your RV, we prepared a 10-step guide on everything you need to do before you tuck it in for a winter slumber.
Step 1: Remove any food items
That’s not something you haven’t guessed on your own. Food that’s not canned, dried or sealed will spoil even with the cold temperatures outside. That’s how oxygen works when there is a food source for bacteria and mould. However, you should remove even food that can withstand the time, as it may attract pests, and you don’t want your RV to become some rat’s winter residence, do you? So get some bags and store everything that can withstand time separately. Then, you can put it back in the RV in spring. The rest- the garbage monster will definitely enjoy it.
Step 2: Clean the RV interior
After all the food is gone, it’s time to take care of the RV’s interior:
First, you need to remove all appliances from the cabinets, strip all cushions from seats and sofas and do a full-on spring cleaning, though it would technically be an autumn cleaning.
Wipe down all surfaces, vacuum under the seats and in tight spots, which you usually skip, as they are tough to reach, and you can even wash the seats, if they have enough time to dry, before you seal the RV.
The fridge and freezer need to be defrosted, and their doors either dismounted or propped open to prevent mould from getting too cosy inside. A nifty trick is putting some baking soda to absorb any foul odours the fridge might produce.
The AC also needs your attention, as its filters and vents need to be cleaned. Unfortunately, you will have to disconnect, wash all filters and return them once they are dry.
Finally, you need to lubricate all hinges. A quick spray with WD-40 will do the trick. Otherwise, rust may have taken over during winter, and you might need a brand-new interior in spring.
Step 3: Drain the water system
This could have been part of step 2, but it’s so important that it deserves a step on its own. If you forget or fail to drain all the water from your RV’s system, you risk it freezing over and resulting in tiny yet devastating fractures in pipes, lines, hoses and tanks. Such damages are not something you’d want to pay for, especially if you find something wrong the hard way by bursting a line and flooding your entire RV.
Your owner’s manual guide will be your best friend on how to drain the system, but most often, it includes draining all water from tanks, pumping water out of the lines and adding some antifreeze specifically designed for RVs.
Step 4: Add antifreeze
Before introducing antifreeze to your RV’s system, ensure you have a non-toxic antifreeze, usually pink. Still, don’t overtrust the colour and read the label. After all, this thing will go through your water supply routes, and you don’t want to wash your hands or clean your dishes with toxic ingredients. Furthermore, you will need to bypass the water heater, as otherwise, you will just waste a considerable amount of antifreeze for nothing. Thankfully, there are easy-to-use bypass kits on the market so that you can do it yourself. However, if you have any doubts, seeking professional help is nothing to be ashamed of.
Step 5: Fill and stabilise the fuel tank
That’s an easy one, although not very wallet-friendly. Since fuel breaks down over time, running such fuel through your system might cause damage. To prevent this, you need to add some stabiliser to the mix. Add the fuel stabiliser to an almost full tank and run the engine long enough so it will disperse throughout the entire system. After that, refill the tank to the top. You might wonder why you don’t just drain the fuel altogether. That’s a bad idea, as an empty tank may succumb to rust and other damages caused by condensation.
You should also top off other relevant fluids like antifreeze, steering fluid, brake fluid, and windshield cleaner. The last one should be a winter mixture that can withstand temperatures up to -20. To finish this portion off, you should change your oil as well. This should get you through to spring.
Step 6: Disconnect the batteries
You may find out you need a new battery. Just like any other battery, your RV’s one is no different. It will drain significantly faster due to the cold and come spring. To prevent this unnecessary expenditure, you must disconnect and store your battery separately in a relatively warm environment, away from heat sources.
When you take off the battery, check if the water levels are up to the norm and fill the containers if needed. Ensure the battery stays below 80% charge, which is not that tough if you keep it in a warm place. Make sure to wear protective gear, as the fluid inside the battery is highly acidic in nature, and it will cause considerable damage if it touches your skin or, God forbid, your eyes.
Step 7: Protect the tires
Tires are a restless bunch, and they don’t like standing idly by. Just sitting there in extreme heat or cold is even worse for them, as they lose their flexibility and start cracking. Moreover, the RV is not particularly well-known for its lightweight structure, so staying in a single spot for months may cause tire deformation. Needless to say, you need to rotate the tires from time to time or, better yet, reduce some of the weight by lifting each axle with a jack. You can use some blocks if a jack can’t fit the storage place. Finally, to protect them from the extreme cold, you should cover them with an appropriately sized tire cover.
Step 8: Make your RV pest-resistant.
By now, you’ve taken the first steps with cleaning and disposing of any food left. The most important step, however, is to seal all entry points through which small rodents or insects can find their way in. That’s easier said than done, of course, but that doesn’t mean you shouldn’t take steps to prevent critters or other pests from taking over your RV. You should fill with silicone or foam cracks and openings in the RV’s exterior and place some traps inside and around the vehicle. You can even use some repellents and peppermint spray. They are quite effective in discouraging all rodents and insects from making your RV their winter residence.
Step 9: Cover your RV
That step is self-explanatory, but before you get to this part, you must take some extra steps to preserve your RV’s exterior. First, you need to clean the surface with soap and water properly, so you can put a layer of spray-on wax. This way, you will prevent the exterior from rusting, lubricate all external hinges and apply UV protection to the tires and all rubber seals. After you are done, you can cover the RV to protect it from moisture, snow, rain and sunlight.
Final Step: Choose a safe location
Ideally, you have a big enough garage to fit the RV. If you don’t have such, you need to look for a secure, reliable and easily accessible storage facility capable of storing your mobile home. It’s best to keep your vehicle indoors with a roof, despite the extra precautions you’ve taken. A nice bonus will be if you have control over the temperature inside and if you have permanent access to your RV. Moreover, having CCTV is a layer of protection you shouldn’t compromise on.
Follow these ten steps, and you can enjoy your RV next spring without spending a bucket load of money on repairs after the winter.