


Sustaining the efficiency and longevity of your HVAC system is crucial for ensuring a comfortable living environment, particularly for the condenser coils.
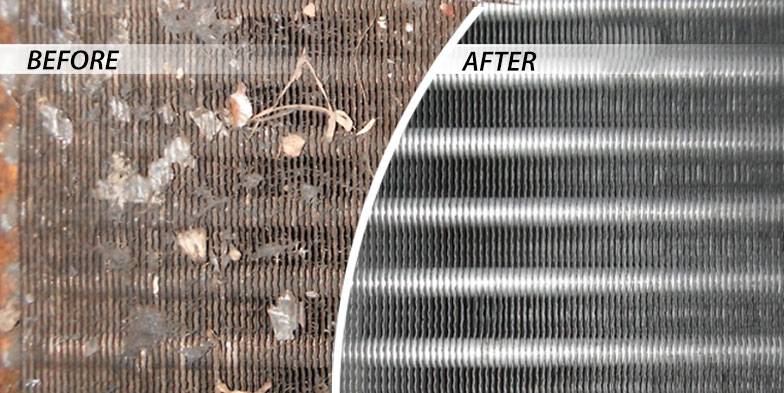
These coils play a pivotal role in the cooling process, transferring heat away from your home. Over time, however, they can become clogged with dirt, debris, and other pollutants, significantly reducing your system’s effectiveness and increasing energy costs.
If you’re looking for a professional service to help you keep your HVAC coils spotless and your system running smoothly, check out the following link: https://www.callautumn.com/phoenix-az-heating-ac-service/.
Table of Contents
1. Turn off the power
Safety is paramount when working on your HVAC system. Before starting the cleaning process, you must turn off the power to ensure a safe environment for maintenance work. To do this, locate the outdoor disconnect box near the condenser unit.
It is usually a metal box mounted to your house’s outside wall. Open the box and look for a switch or a pull-out tab. Flip the switch to the “off” position or pull the tab out to cut the electrical supply to the condenser coils.
It’s also a good idea to turn off the HVAC system’s circuit breaker to add an extra layer of safety. This will ensure that all electrical currents are halted, preventing any potential electric shock or damage to the system during cleaning.
2. Remove debris
Once the power is safely turned off, it’s time to clear any visible debris from around the condenser unit. Begin by removing leaves, twigs, and loose dirt that have accumulated around the coils. Utilize a soft brush or a handheld vacuum to gently clean the exterior without bending the coil fins.
For debris stuck between the fins, a fin comb, specifically designed for HVAC maintenance, can be used to remove any obstructing materials without causing damage.
Wear gloves to protect your hands during this process and maintain the integrity of the coils by handling them delicately. This step is critical for preventing airflow obstruction and ensuring your HVAC system operates efficiently.
3. Apply coil cleaner
After removing the debris, the next step is to apply a commercial coil cleaner, which you can purchase from a local hardware store or an HVAC supplier. Ensure you choose a cleaner specifically designed for HVAC condenser coils to avoid any potential damage.
Before application, carefully read and follow the manufacturer’s instructions. Generally, you will spray the cleaner directly onto the coils, covering them thoroughly. The foam from the cleaner will start to break down the dirt and grime on the coils.
Let the cleaner sit on the coils for the time specified by the manufacturer, usually five to ten minutes. This dwell time is crucial for the cleaner’s chemical agents to dissolve the contaminants effectively. For heavily soiled coils, a second application may be necessary to remove all the build-up.
4. Rinse the coils
After allowing the coil cleaner to sit for the recommended duration, it’s time to rinse the coils thoroughly. Using a garden hose, adjust to a gentle spray, carefully rinse the cleaner off the coils, and remove all traces of the foam and dislodged debris.
Avoid using a high-pressure washer, which can bend the fins and damage the coils. Rinse from the inside out to ensure all cleaners and debris are pushed away from the core of the coils. Continue to rinse until the water turns clear. This indicates that all cleaners and contaminants have been removed from the coils.
5. Straighten coil fins
The fins on your HVAC condenser coils play a vital part in the heat exchange process, but they can quickly become bent or crushed, impede airflow, and reduce efficiency. To straighten them, use a fin comb or a coil fin tool, which can be found at most HVAC supply stores.
Gently run the tool along the fins to straighten them out, being careful not to apply too much pressure and cause further damage. Work your way around the coil, straightening any visibly bent fins.
6. Check and clear the drainage
Proper drainage is essential to the functioning of your HVAC system, ensuring that water formed during the condensing process is effectively removed. Start by locating the drainage hole or pipe near the base of the condenser unit. It’s common for this area to become clogged with debris, algae, or sediment, leading to poor drainage and potentially causing water damage.
To check the drainage, pour a small amount of water into the drain pan to see if it exits quickly and freely. If the water stagnates or drains slowly, there’s likely a blockage. Clear any visible debris from around the drainage hole.
For more stubborn blockages, use a plumber’s snake or a stiff wire to remove the clog. After clearing the blockage, pour water again to ensure it drains smoothly.