


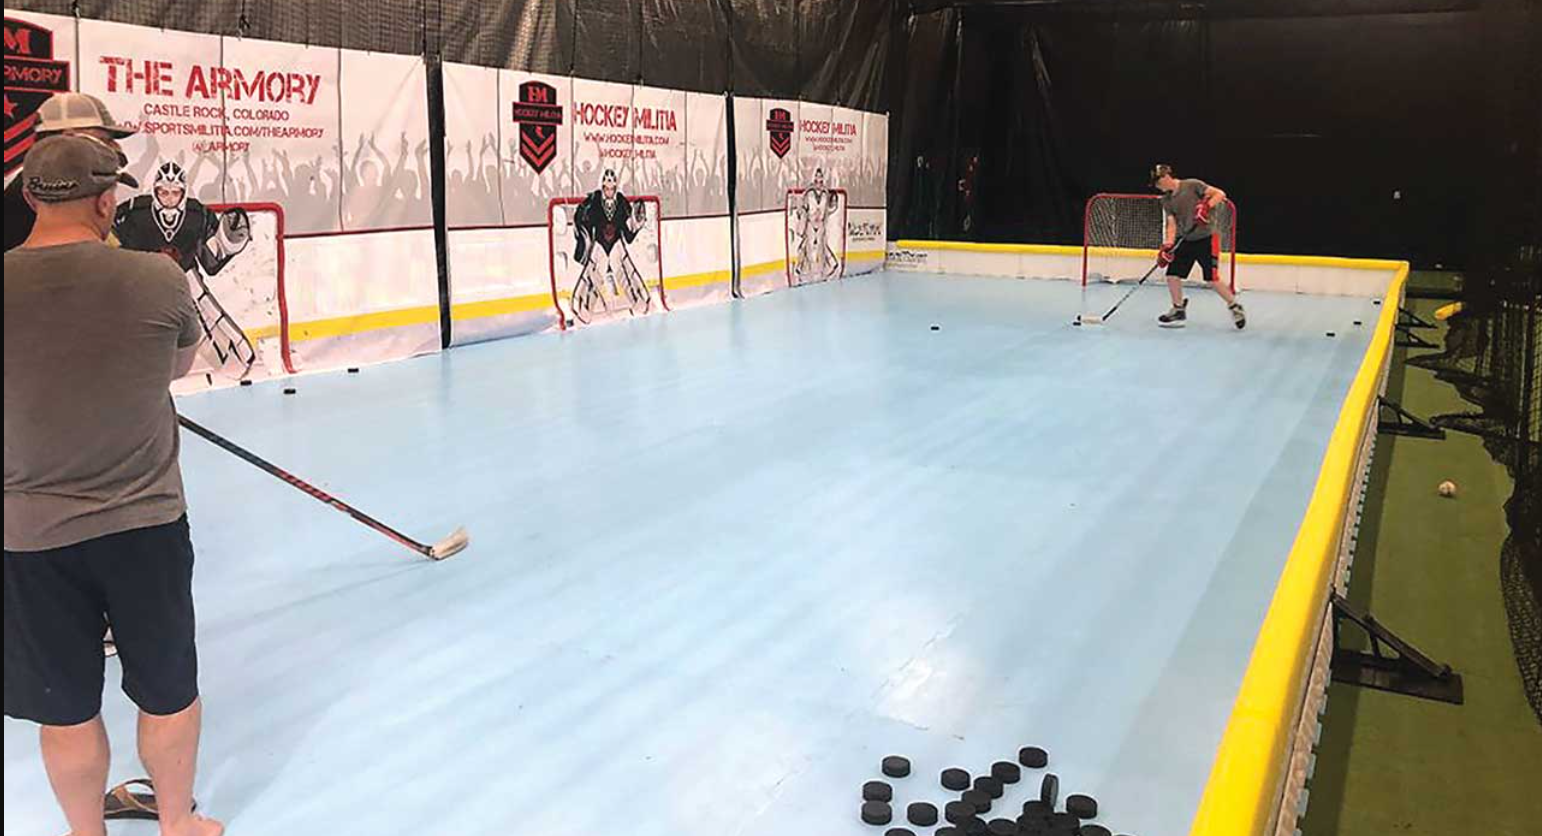
Are you tired of waiting for winter to enjoy your favorite sport of ice skating? Have you considered installing synthetic ice panels in your backyard or indoor space? Synthetic ice panels are a cost-effective and easy-to-maintain alternative to traditional ice rinks. These state-of-the-art panels provide a perfect imitation of real ice, allowing you to skate with ease in any climate. Made from high-quality polymers, these synthetic ice panels can withstand extreme temperatures without denting or warping. Whether you’re practicing your slap shot or working on new figure skating moves, Synthetic ice panels allow you to train like a pro all year round. In this blog, we will guide you on how to install synthetic ice panels for a perfect skating surface. From choosing the right location to preparing the surface and installing the panels, we’ve got you covered. So, let’s get started and create your own skating rink without any hassle!
Table of Contents
Step-by-Step Instructions for Installing Synthetic Ice Panels
Synthetic ice panels are a great way to create a perfect skating surface in your backyard or indoors. Installing synthetic ice panels is not as difficult as it might seem. To help you out, we have put together a step-by-step guide that will make the process of installing synthetic ice panels easy and straightforward.
Step 1: Prepare the Surface
Before you begin installing the synthetic ice panels, you need to prepare the surface. The surface should be clean, dry, and level. If the surface is not level, you will need to level it using a self-leveling compound or by adding a layer of concrete. It is important to ensure that the surface is completely dry before installation to prevent any moisture from getting trapped underneath the panels.
Step 2: Lay the Panels
Once the surface is prepared, it is time to lay the synthetic ice panels. Start by laying the first panel at the far end of the surface and work your way towards the other end. Make sure that each panel is aligned and interlocked securely with the previous panel. Use a rubber mallet to gently tap the panels into place and ensure that they are flat and level.
Step 3: Cut the Panels
If you need to cut a panel to fit around an obstacle or to fit the dimensions of your surface, use a circular saw with a fine-toothed blade. Make sure to measure and mark the panel accurately before cutting it.
Step 4: Finish the Edges
To finish the edges of the synthetic ice surface, use edge trim pieces. Attach them to the perimeter of the surface using screws or adhesive. This will help to prevent any tripping hazards and give the surface a finished look.
Step 5: Add Accessories
Finally, add any accessories you want to use, such as hockey boards or skating aids. Make sure that they are securely attached to the surface and will not shift or move during use.
By following these simple steps, you can easily install synthetic ice panels in your backyard or indoor space. With your own personal skating rink, you can enjoy ice skating any time of the year!
DIY Synthetic Ice Rink: How to Install Synthetic Ice Panels
Synthetic ice rinks are becoming increasingly popular due to their cost-effectiveness and ease of maintenance. They offer a perfect skating surface all year round, regardless of the weather conditions. If you are thinking of installing a DIY synthetic ice rink, this guide will help you through the process.
Firstly, measure the area where you want to install the synthetic ice panels. The panels come in different sizes, so you will need to know the exact measurements to order the correct amount of panels.
Next, prepare the surface where you will install the synthetic ice panels. The surface must be level, smooth, and free of debris. You can use a concrete or asphalt surface, or even a wooden deck. If your surface is not level, you can use a self-leveling compound to even it out.
Once the surface is ready, you can start installing the synthetic ice panels. Begin by laying out the panels in the desired pattern, making sure they fit snugly together. You may need to trim some of the panels to fit around obstacles or corners.
After the panels are in place, you will need to secure them to the surface. Depending on the type of surface you are using, you can use adhesive or screws to hold the panels in place. If you are using adhesive, make sure to follow the manufacturer’s instructions carefully.
Once the panels are secured, you can add the finishing touches. This includes adding boards around the perimeter of the rink, as well as any additional accessories such as goal posts or skating aids.
Finally, it’s time to test out your new synthetic ice rink! Make sure to follow all safety guidelines and wear appropriate gear while skating. With proper maintenance, your synthetic ice rink can provide years of enjoyment for you and your family.
Creating an Outdoor Ice Skating Rink with Synthetic Ice Panels
Creating an outdoor ice skating rink with synthetic ice panels requires careful planning and execution. Synthetic ice panels are a popular alternative to real ice for creating a perfect skating surface. They are made from high-density polyethylene, which makes them durable and long-lasting.
The first step in installing synthetic ice panels is to determine the size and location of the rink. The area should be level and free of any obstacles. Once you have chosen the location, you can start preparing the ground by removing any debris or vegetation.
Next, you need to lay down a base layer of plastic or tarpaulin. This will serve as a moisture barrier and prevent water from seeping into the ground. It is important to ensure that the plastic or tarpaulin is properly secured and free of any wrinkles or folds.
After the base layer is in place, it’s time to lay down the synthetic ice panels. These panels typically come in interlocking pieces that can be easily fitted together like a puzzle. It is important to follow the manufacturer’s instructions for proper installation and use the recommended tools and equipment.
Once the panels are in place, it is recommended to add a glide enhancer to the surface. This helps to reduce friction and create a smoother skating experience. There are several types of glide enhancers available, including sprays, powders, and liquids.
Finally, you can add the finishing touches to your ice rink. This may include boards or barriers to keep skaters confined to the rink, lighting for nighttime skating, and decorative elements to enhance the overall look and feel.
Overall, creating an outdoor ice skating rink with synthetic ice panels can be a fun and rewarding project. With careful planning and execution, you can create a perfect skating surface that can be enjoyed for years to come.